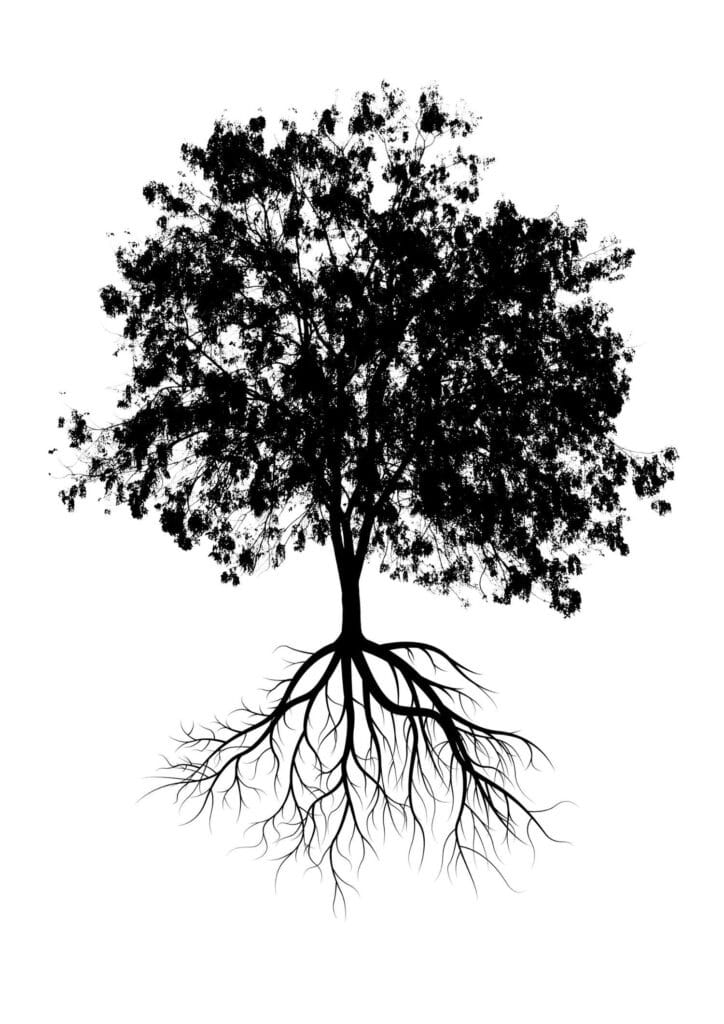
tree drawing with roots and branches
When we think of trees, we often envision the canopy of branches and leaves above. But what about all those roots?
Drawing tree roots can be a great challenge for artists and art students alike, but it's also an important skill to master if you want to become a more well-rounded artist. In this blog post, I'll give you 10 easy steps to draw tree roots with just a few marks on paper!
Draw Tree Roots in 10 Simple Steps
Step 1: Draw the ground line

Does not have to be straight. Add bumps and waves to give it a realistic soil effect.
Step 2: Add a semi-circle beneath the ground line
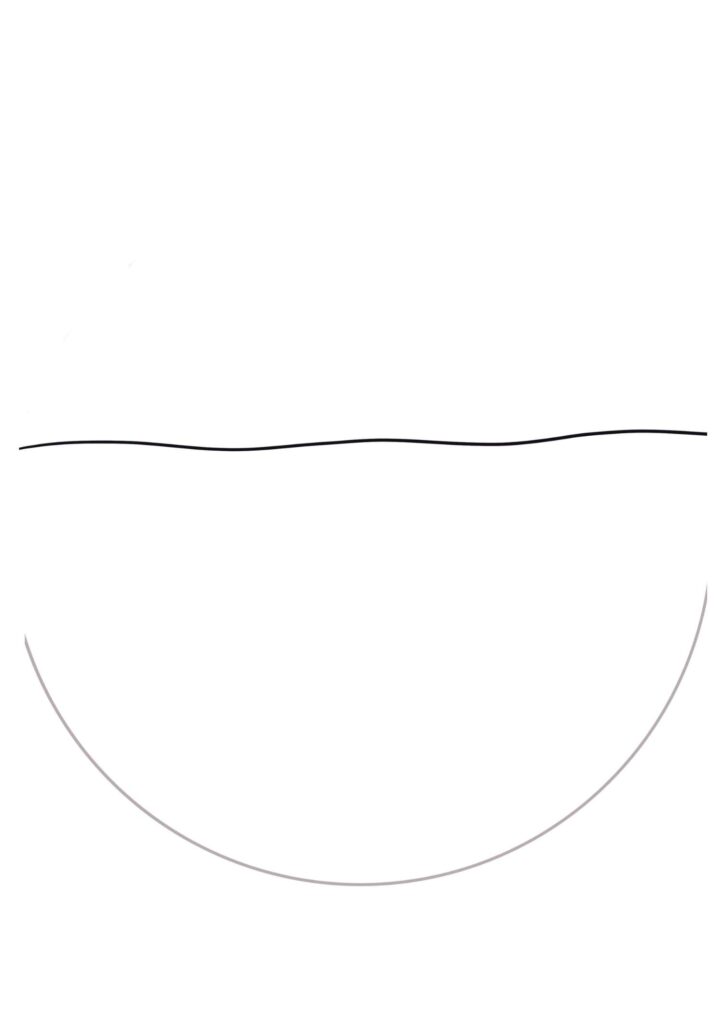
This semi-circle gives you a guideline for how long to draw your roots. In reality, the roots of a tree do not fit perfectly into a semi-circle. However, using a semi-circle guideline helps you to create a symmetrical and aesthetically pleasing root composition for your drawing.
Step 3: Draw the first set of roots
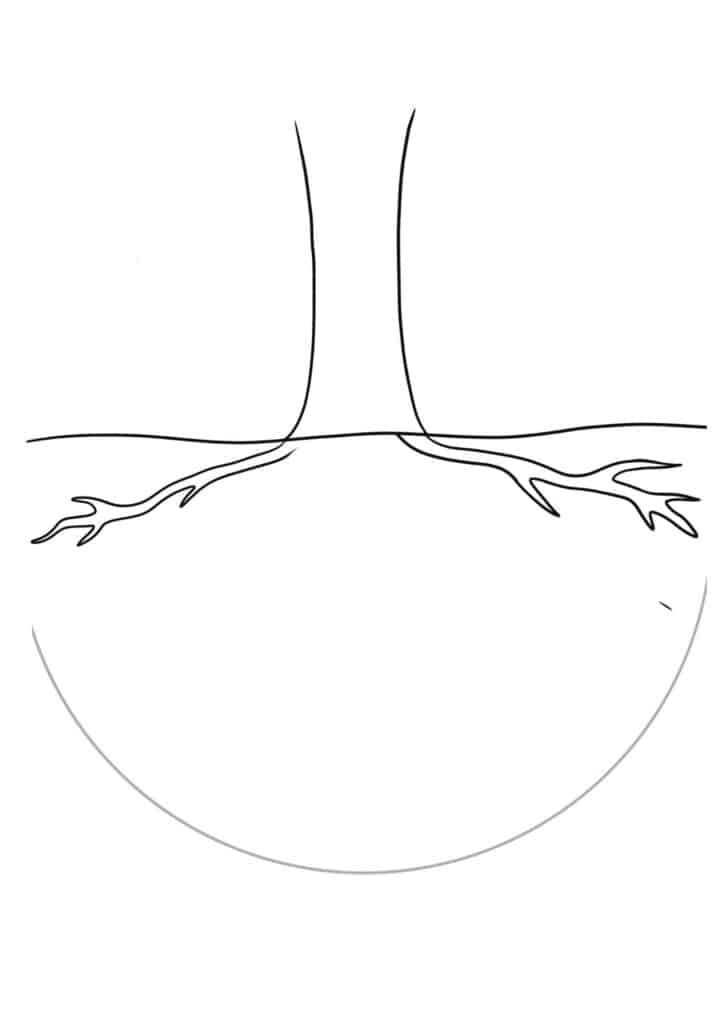
The shape of the roots I have drawn is basically composed of a solid long root with smaller roots shooting off the center root. The main root starts off thick and tapers to a thinner end.
You can happily leave out the semi-circle shape and use a more natural root pattern (have a look at the end of the article for more examples of tree roots drawings).
Step 4: Add more roots
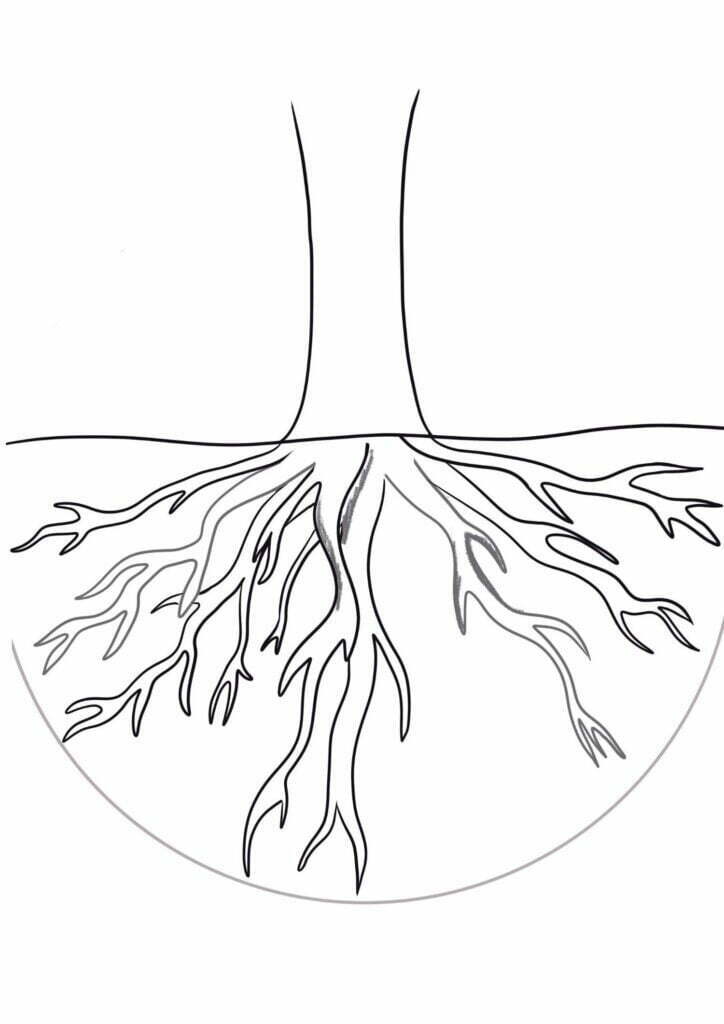
I observe the position of the roots I already have drawn and start adding more to build up a network of roots. This helps to create the effect of realistic tree roots drawing.
Step 5: Add final roots
Look at the position of the roots you have drawn and add further roots to balance out the tree root composition.
Step 6: Start shading the first half of the roots
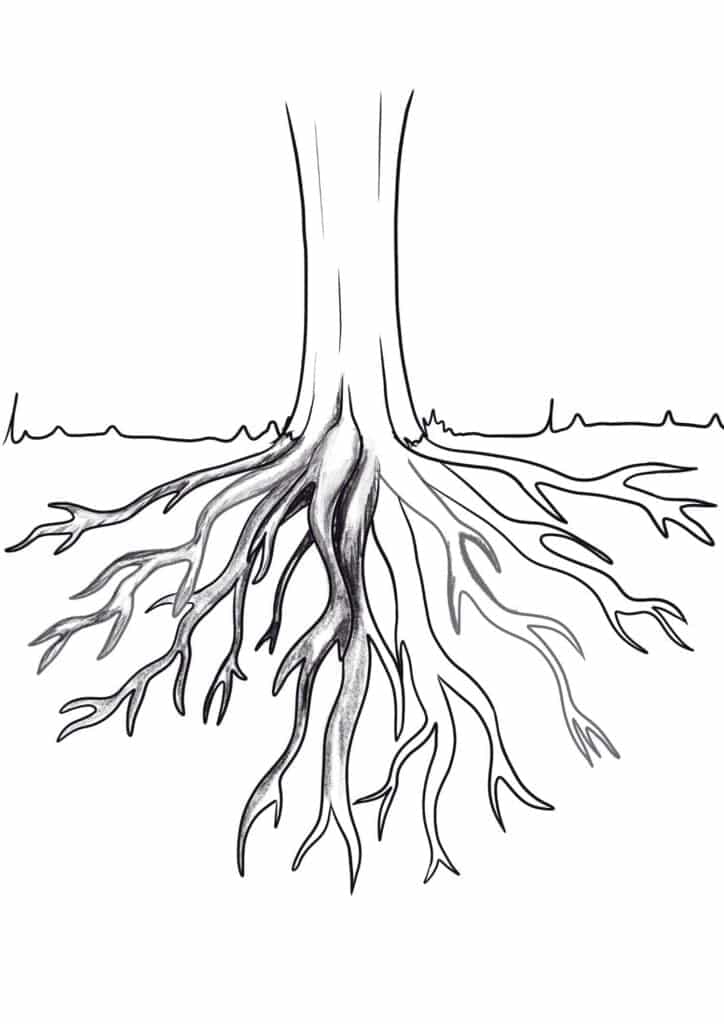
You can now start identifying where the shadow areas of the roots are. I like to sketch shadow on either side of a root, with the mid-section of the root appearing more light. This creates a three-dimensional effect and helps to further increase the realism of the drawing.
Step 7: Shade second half of roots
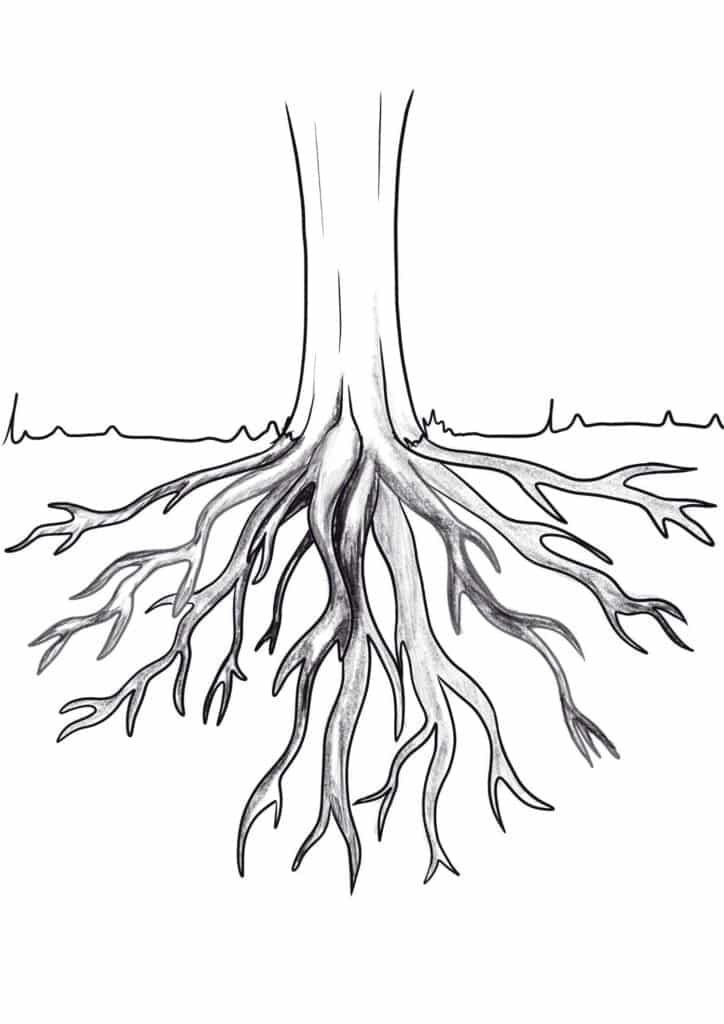
You can now start identifying where the shadow areas of the roots are. I like to sketch shadow on either side of a root, with the mid-section of the root appearing more light. This creates a three-dimensional effect and helps to further increase the realism of the drawing.
Step 8: Darken your shadows
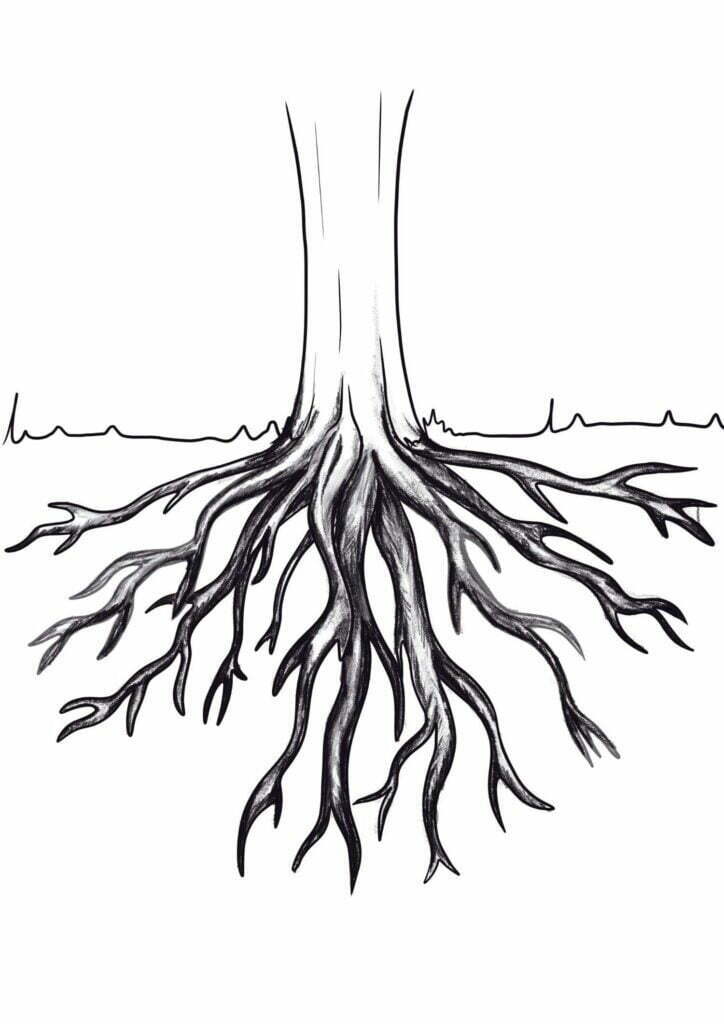
Continue building up your shading in your shadow areas. This will help to increase the contrast in your drawing. Using adequate contrast in drawing allows a drawing to be more effective and have more impact on the viewer.
I would also like to point out that I tried to create a sense that some roots were embedded further back in the soil than others. To do this, I added darker shading to the roots at the back and left the roots towards the front lighter.
Pro Tip: You can also use a kneaded eraser to lift pencil shading off areas you want to lighten in your artwork.
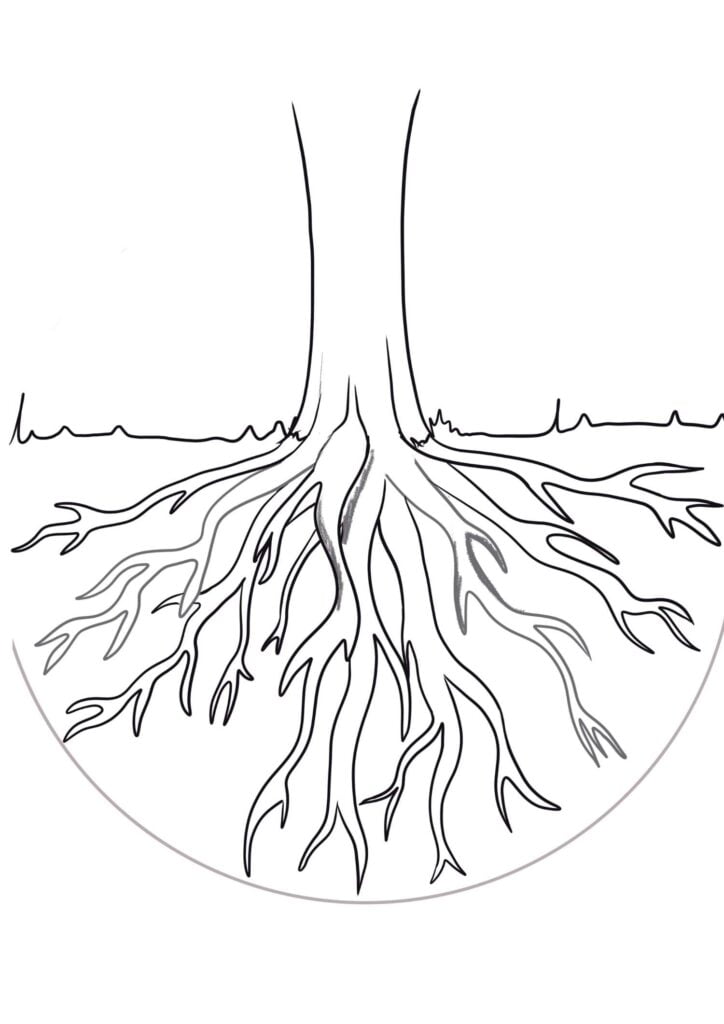
Step 9: Shade your tree trunk and add tufts of grass
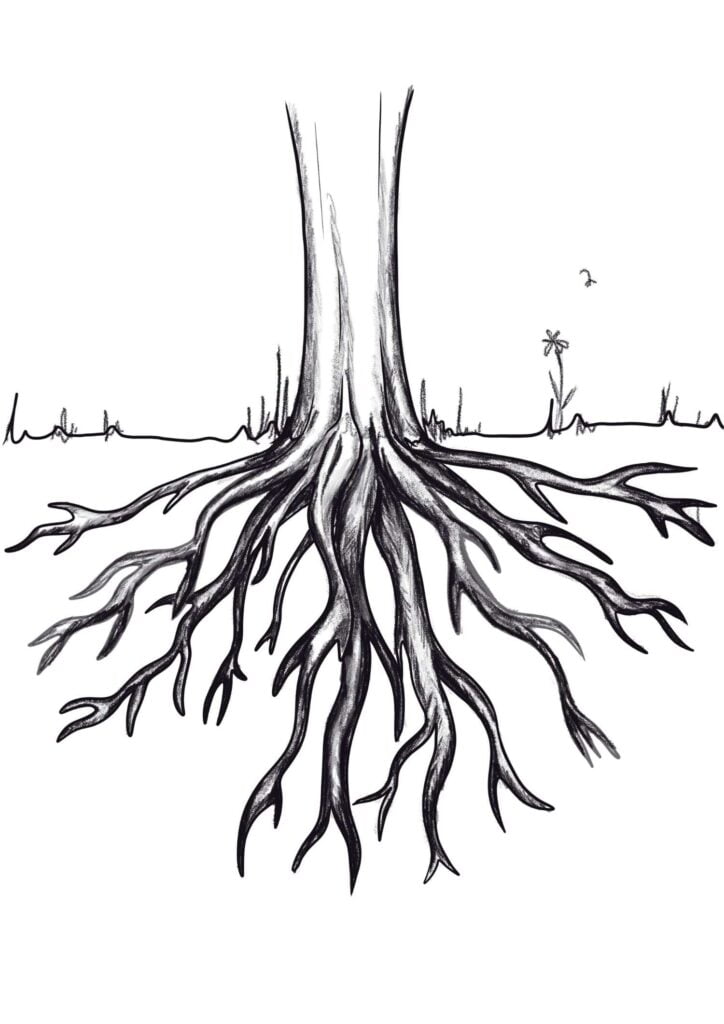
Add some shading to the trunk of your tree to give it a sense of realism.
To give your drawing more character, you can add a tuft of grass here and there, as well as a flower.
Step 10: Draw simple rocks
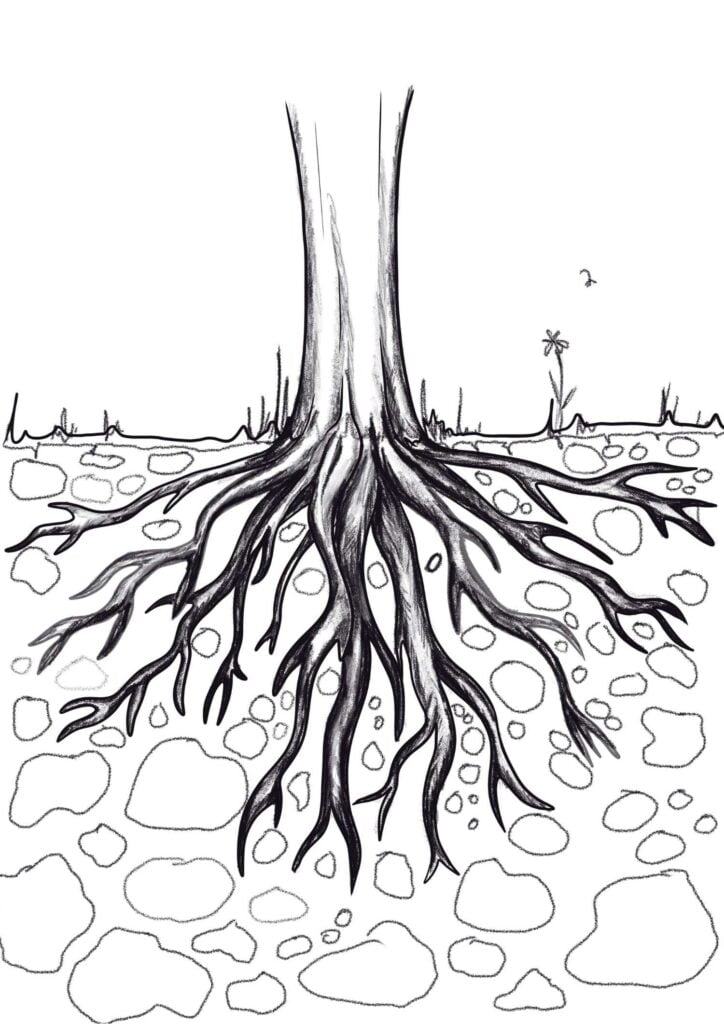
Add some simple rock shapes in the soil surrounding your tree roots. These simple shapes will further help the viewer to understand what is happening beneath the surface of the soil.
I have used simple irregular line drawing to sketch the impression of rock shapes within the ground.
What art supplies do you need to draw tree roots of your own?
Paper (I recommend this paper because you can use all dry mediums on it, but also it holds alcohol markers, light watercolor washes, and watercolor pencil really well!)
Sketchbook (I always recommended drawing in a sketchbook. This not only protects your drawings, but it also can be a great way to reflect on your artwork and grow!)
Drawing Pencils (It is good to have a range of drawing pencils available so that you can map out your drawing and then go further and deepen your shadows!)
Kneaded Eraser (In my opinion, it is essential to have a good kneadable eraser. It means you can easily mould your eraser to a sharp point for erasing finer details, or you can use it to lift off pencil or charcoal when you have over-shaded an area!
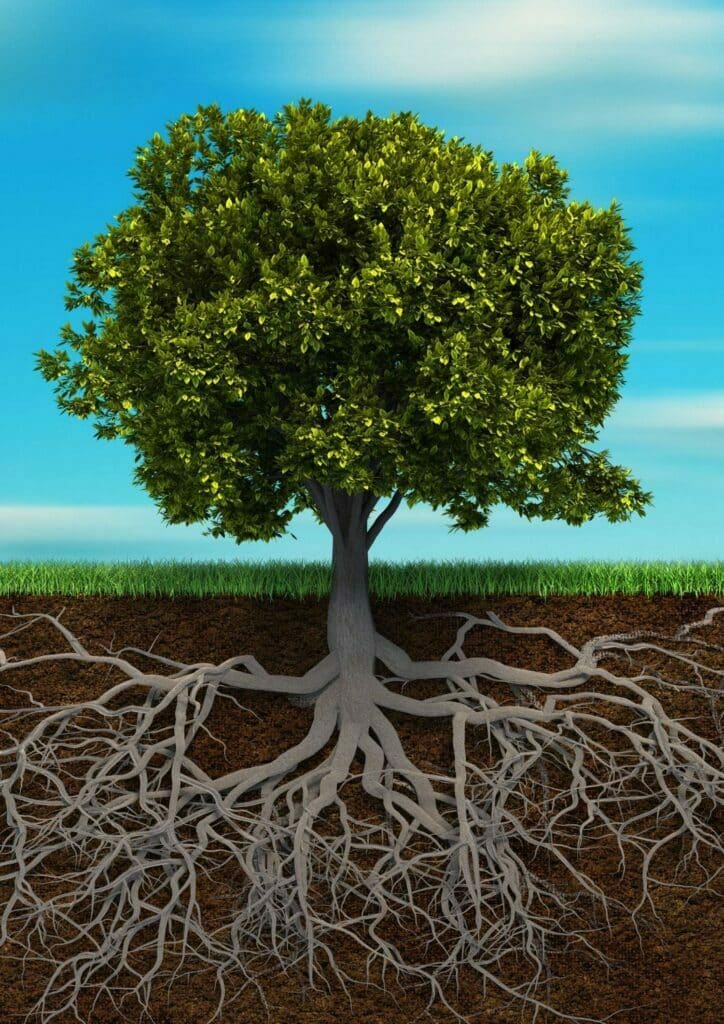
Why are we fascinated by roots beneath the ground?
From my perspective, I think it is partly because roots are a symbol of life. They are the unseen foundation that helps a tree to grow tall and strong.
Additionally, roots can be quite beautiful in their own right, with their intricate patterns and curves.
From a biological and scientific perspective, we cannot see what lies beneath the soil every day. And so it's fascinating to get a glimpse of what lies beneath.
In my mind, the tree roots drawing represents an inspiration for all artists and creatives everywhere. The hidden patterns and beauty can be found in everything once you start looking deeply enough…
Tips and tricks when drawing your tree roots…
- Always use good quality pencils. HB, and 2B pencils are a good place to start as you can gradually move up the scale to achieve darker tones in your drawing!
- Make sure that you do a tonal value study before you begin your artwork. This will help you plan out your drawing and give you a feel for how light and dark you need to go with your shading. This will also help you get a more life-like drawing!
- Vary the pressure of your pencil on the paper so that some parts of your roots are darker than others. This will create depth in your drawing and add an extra layer of realism!
- When drawing with graphite or charcoal, use a blending stump to smudge darker areas of your drawing. This will create nice gradients which are more effective for creating shading than using shadows directly next to each other!
- When you are using pencils on paper, use your kneaded eraser to lighten any areas that you want to be lighter. You can also use a kneaded eraser to lift graphite or charcoal off the page when you have over-done it!
- When using a blending stump, a cotton bud or a tissue, always press lightly and layer up your darker tones slowly. If you apply too much pressure with these items they actually move the graphite or charcoal on your paper rather than applying it, which means you will get less contrast in your image!
- You can use an eraser that is used with graphite to mark over pencil marks when you are blending too. If you use a soft charcoal eraser you can also do this, but using an 'erase-marker' will get rid of more graphite than the other two options!
- Don't forget to protect your artwork with fixative when you are finished drawing so that it doesn't smudge or rub off! Also, if possible, keep your art out of direct sunlight exposure so that it can last longer.
- Always start off drawing with a light touch. This will help you plot out your shapes and outlines. Once you have a good sense of this, you can begin to shade more thoroughly.
- As you shade your roots, try to create a sense of depth within your drawing. The trick to doing this is by deepening the tones in the shadow areas and keeping lighter tones.
- When drawing your tree trunk, try to use a range of tones to create the illusion of depth and realism.
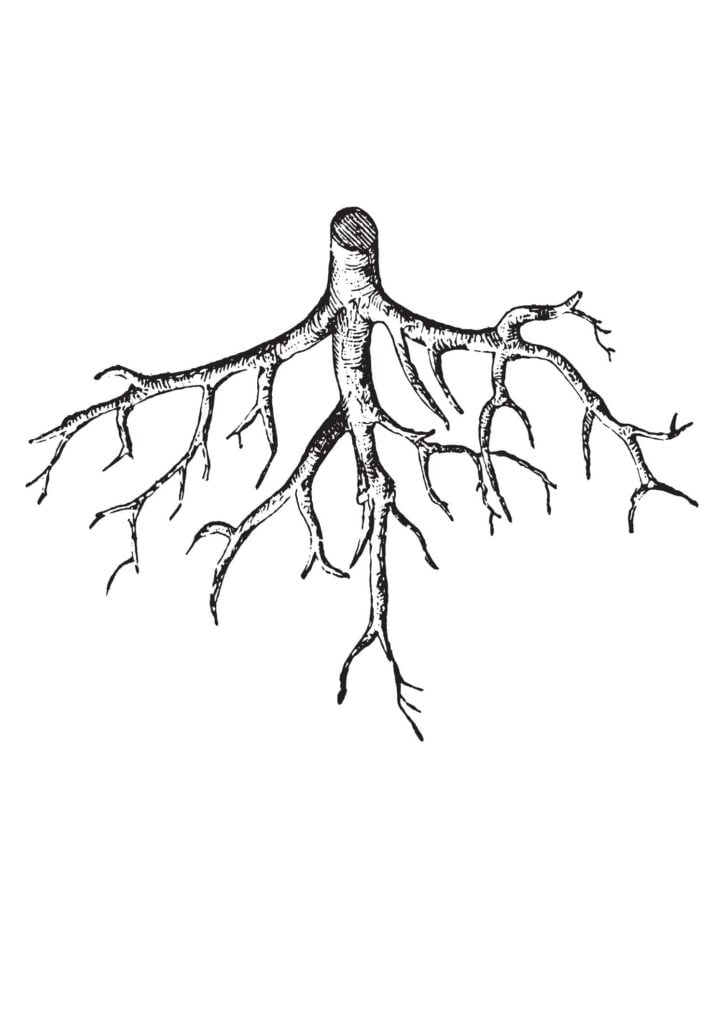
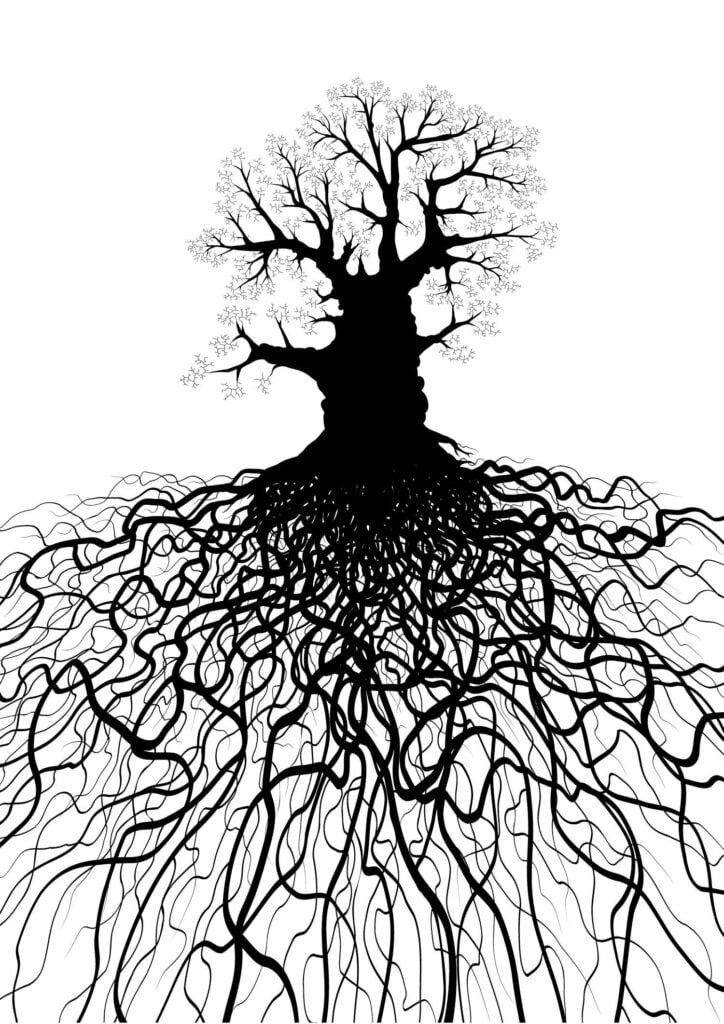
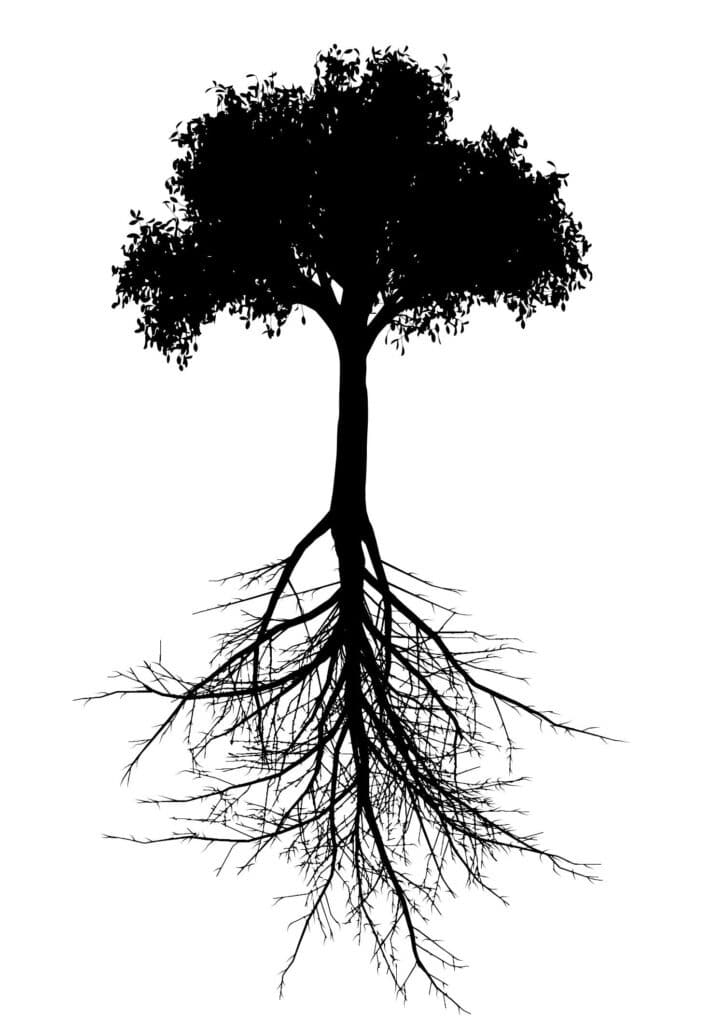
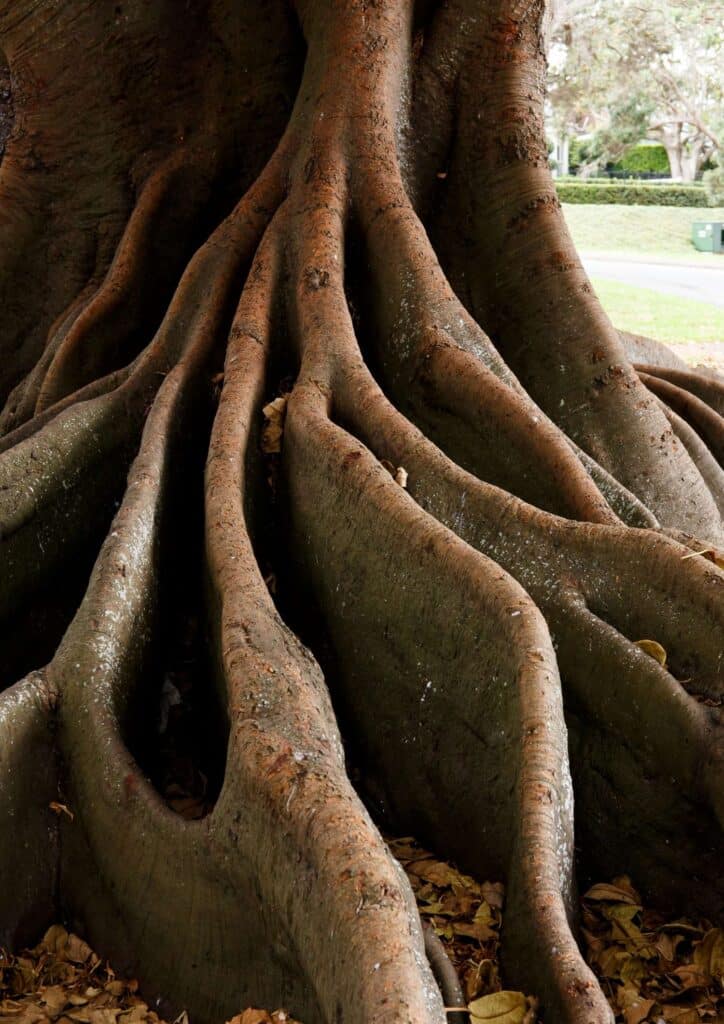
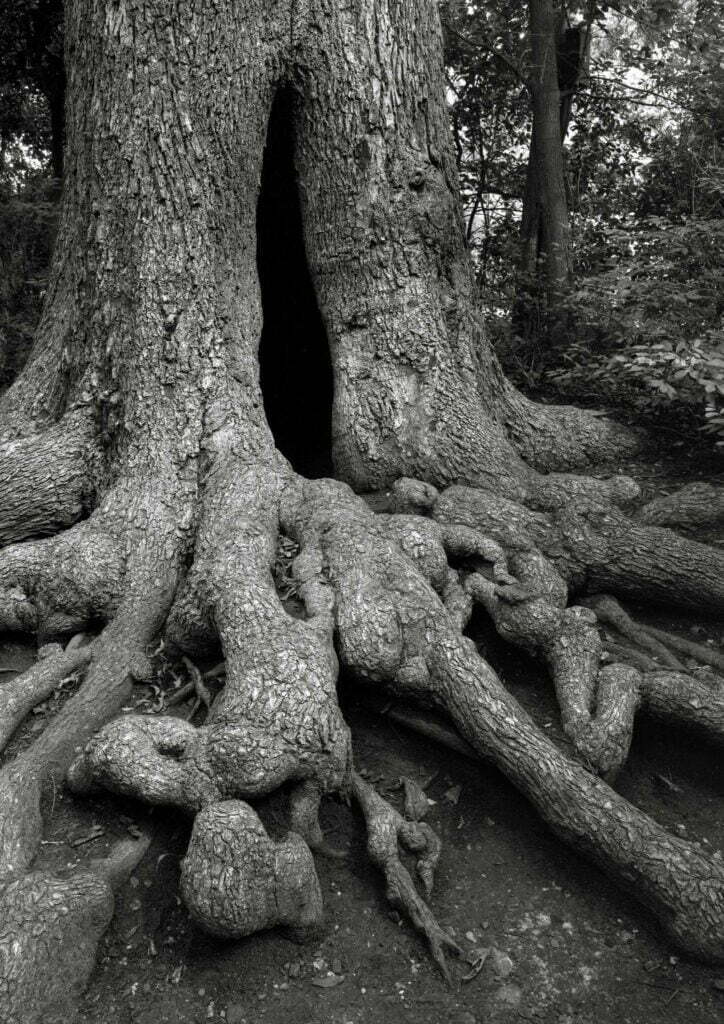
More Drawings and Pictures of Tree Roots for Reference
What can you do with your drawing?
- Frame your drawing and gift it to a friend or relative.
- Print your drawing onto a t-shirt, mug or tote bag.
- Use your drawing as the inspiration for an art installation at school or in your home!
- Create a "tree root" journal page in your art journal.
- Design a set of note cards!
- Print your drawing onto fabric so you can make cushion covers or curtains for your house.
- Use your drawing as the inspiration for a bespoke illustration commission.
- Decoupage and mount your artwork on to a wooden plaque and hang it up in your home or office!
- Photograph your drawing an digitally edit it to create a unique artwork. Share this artwork on Instagram, Facebook or Pinterest!
- Turn your drawing into a digital art piece by scanning it and adding some digital effects in Photoshop. Save this to create unique wallpapers for your phone or computer!

Conclusion
Drawing a convincing representation of the earthy, tangled network of roots is a great skill for any artist to have. It can be quite difficult at first, but with practice, you'll develop your own style and technique that will make drawing them much easier than before.
With these 10 steps and some practice, you can easily sketch your own. Now it's your turn! Draw tree roots and share your work with me in the comments below.
Happy drawing!
Other articles you may enjoy…
[3 Simple Steps to Create an Outline Drawing]
[12 Easy Steps to an Accurate Side Profile Drawing]
[Exquisite Rose Drawing]
[How to ideas for drawing]
[11 Ways to Improve Your Drawing]
Source: https://www.artsydee.com/draw-tree-roots/
0 Response to "tree drawing with roots and branches"
Post a Comment