drawing a simple christmas tree
Handcrafted cards and tags are one way to make Christmas a little extra special. Do you get a little intimidated at the thought of drawing Christmassy things? Starting with a simple shape (in this case, a long triangle) makes it really simple to draw your own Christmas trees in almost any style.
I have four little step-by-step trees you can follow exactly or use as a jumping off place for your own creative ideas.
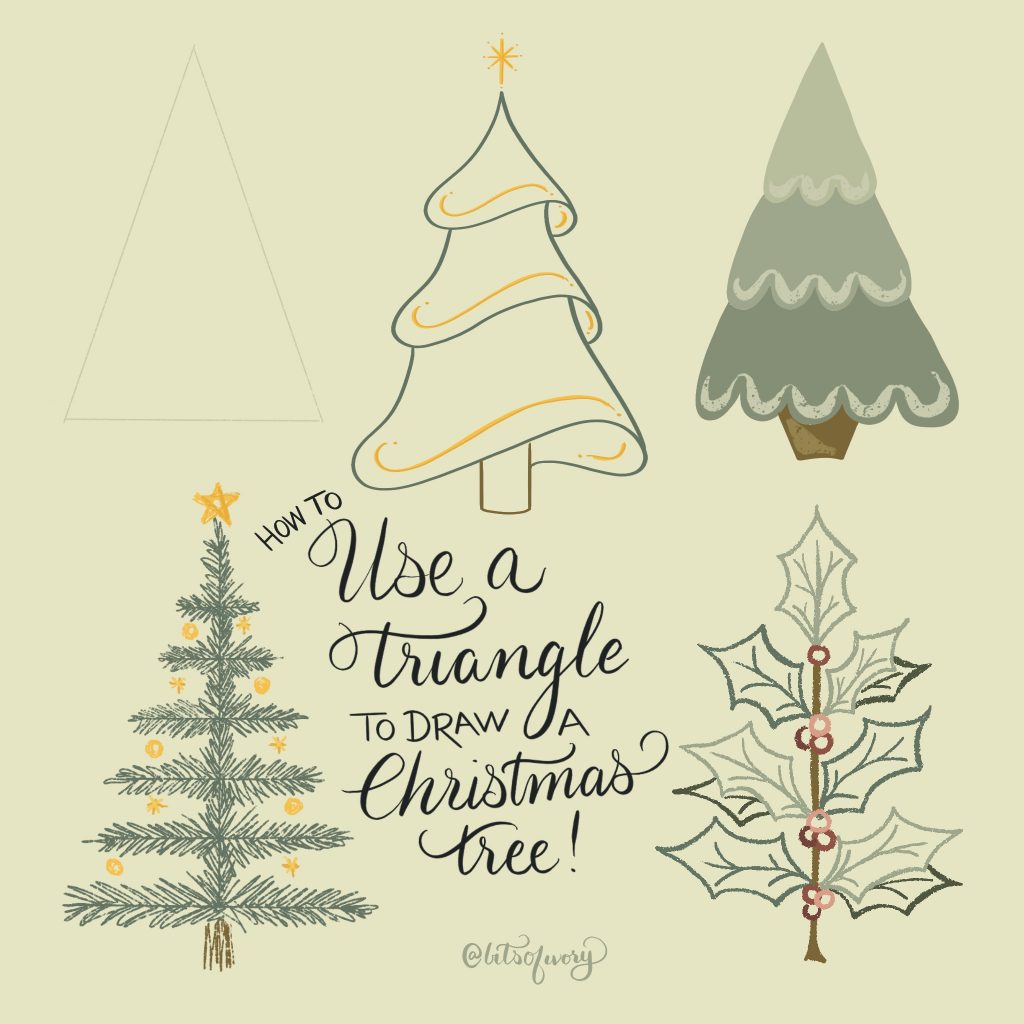
To draw any of these Christmas trees start with a triangle in the same shape you want your final tree. It can be long and narrow or short and wide. The shape adds so much personality to the final tree! Remember to draw it lightly in pencil since you'll likely want to erase it when your tree is finished!
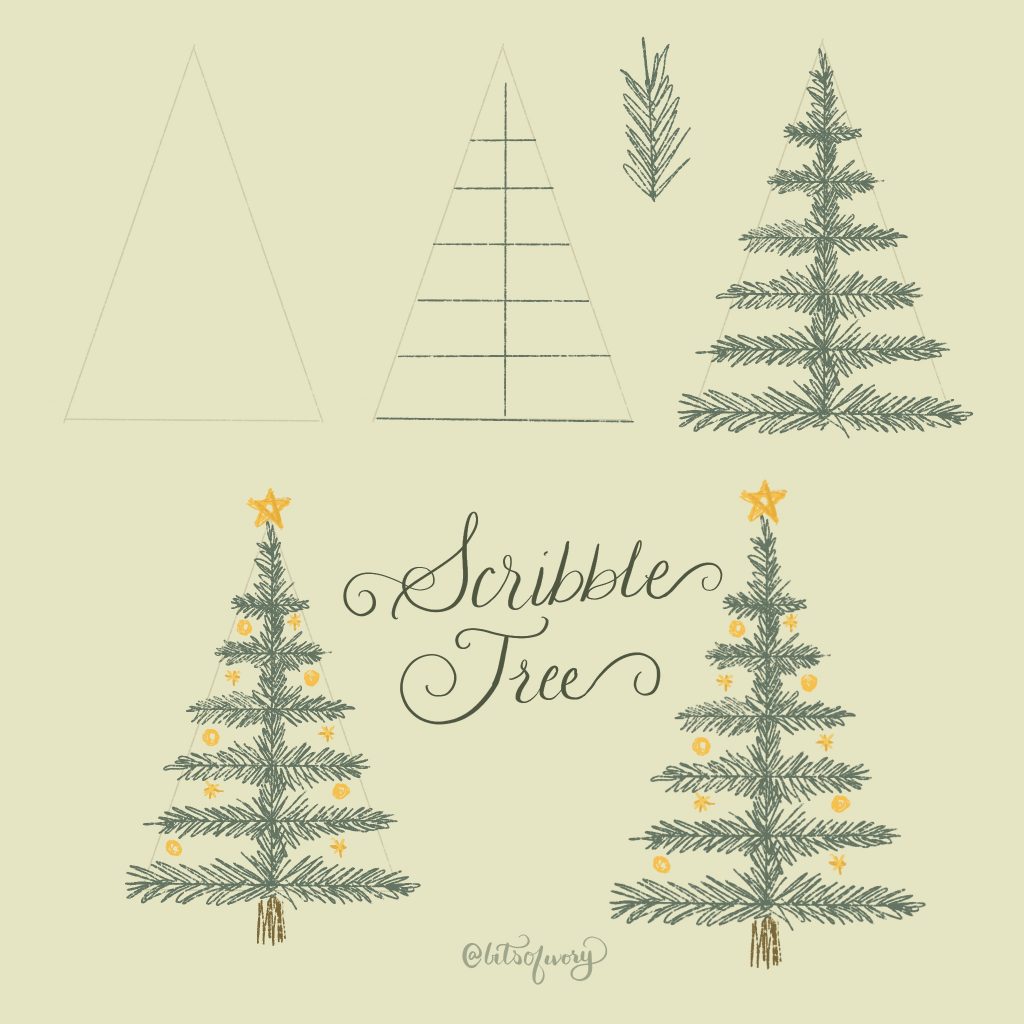
Draw a Scribble Christmas tree
Pine needles are the perfect fit for a scribble style! You can draw a scribble Christmas tree by drawing a line down the center of your triangle. Draw branches across the entire shape at regular intervals using the triangle as a guide for where to end each line.
Next, scribble pine needles along each side of the lines you've drawn. Make the scribbles narrower as you approach the end of each branch to mimic the pointy ends of pine branches. Scribble a simple rectangle trunk at the bottom.
The tree looks great this way, and perfect for woodsy or outdoorsy events. For Christmas, though, you can add a few ornaments and scribble a star on top of the tree for a special finishing touch.
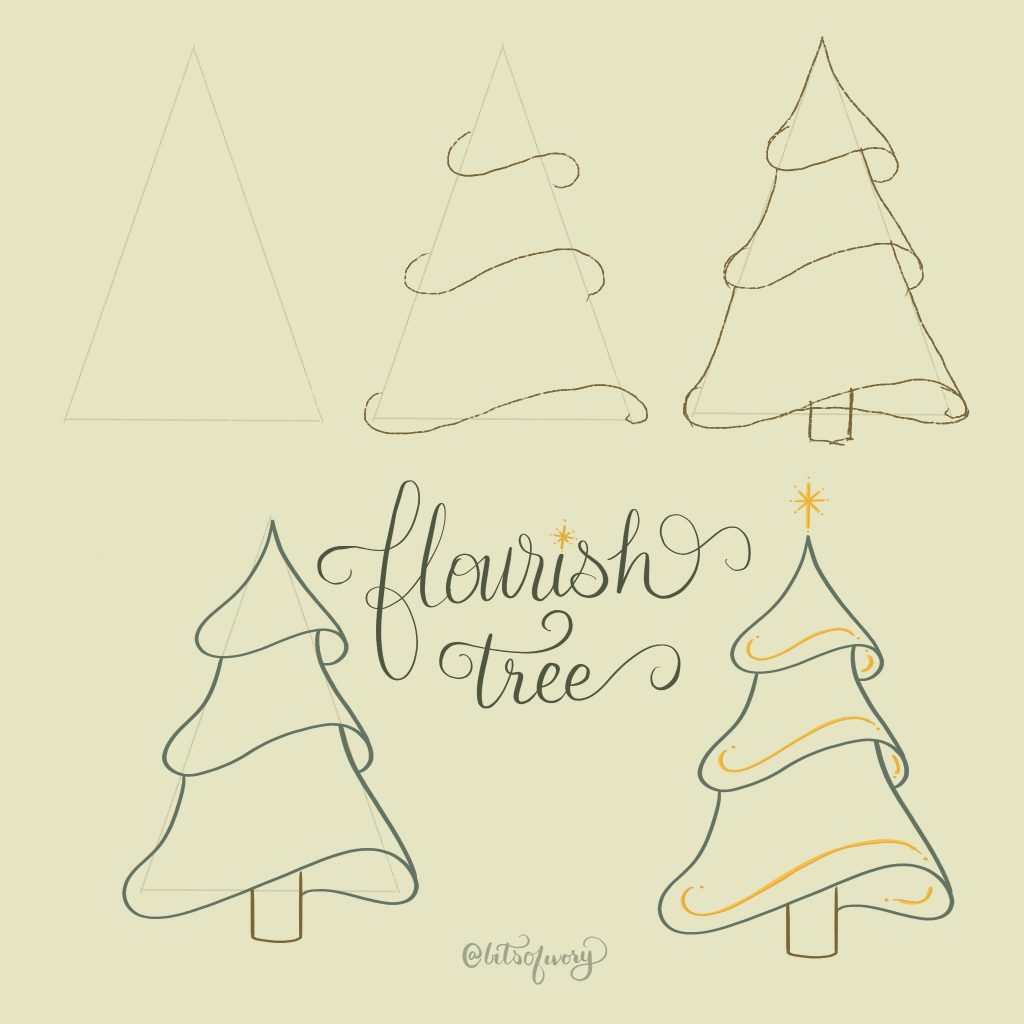
Draw a Flourish Christmas tree
Flourishy Christmas trees look impressive, but they're elegant in their simplicity. First, sketch three sideways "s" shapes using the triangle as a guide. Next, connect each flourish shape as shown in the illustration above. Draw an open rectangle at the bottom for the trunk.
Draw or paint over your sketch lines for a smooth, finished look. You can erase any visible sketch lines when you're done.
As a final, elegant touch, embellish the tree with lines of gold along each tier of the tree to suggest tinsel. Finish with a sparkly golden star on top.
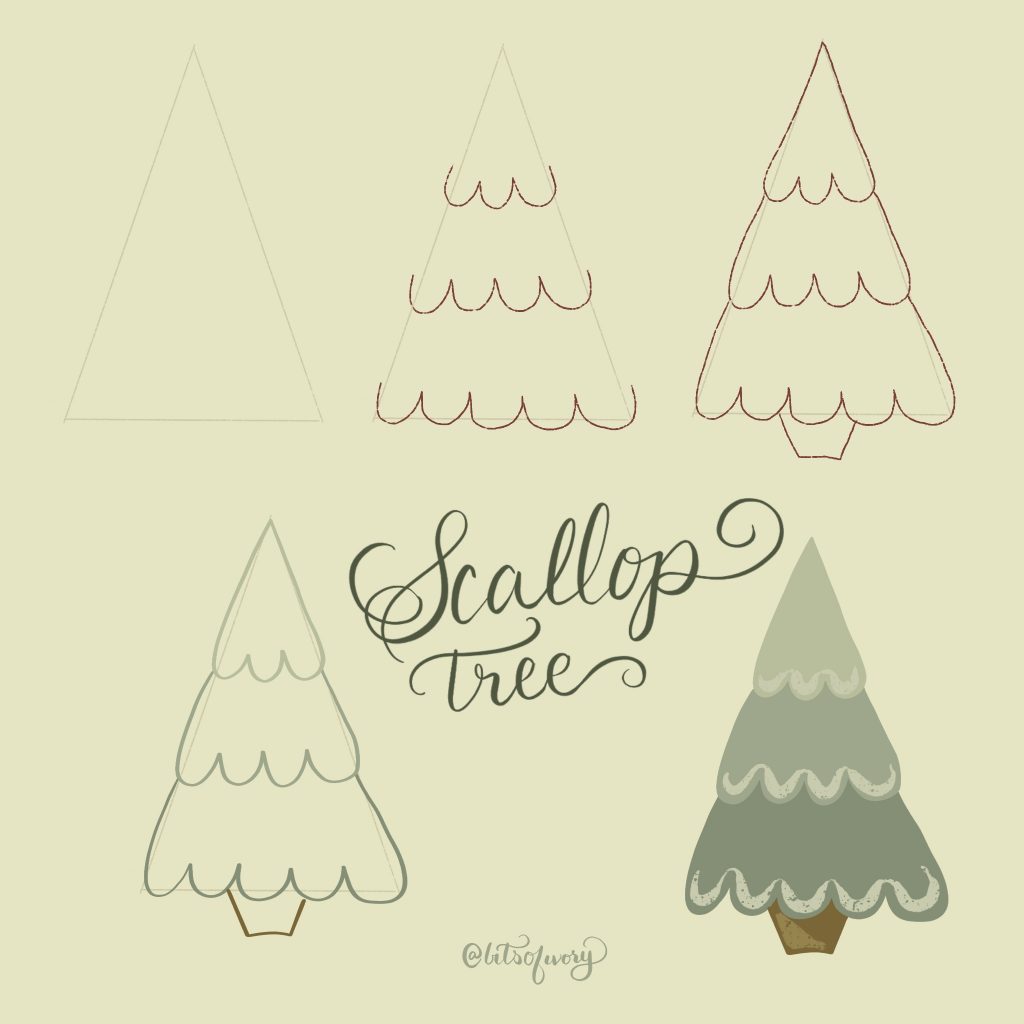
Draw a Scallop tree
Scallops make a fun, whimsical evergreen tree. Begin with three tiers of scallops using the triangle as a guide. You can add a lot of personality and style at this stage. Make the scallops very even, or alternate thick and thin, short and long on each tier for a more playful tree. Next, connect each line of scallops. Finish your sketch with an open square shape at the bottom for the trunk.
Now you're ready to paint or draw over your sketch with three shades of green for depth, with the lightest on top. Draw the trunk in brown, then fill each section.
For a fun final touch, try painting a light line that follows the edge of each tier for added depth and detail. You can even add a highlight to the trunk as a finishing touch.
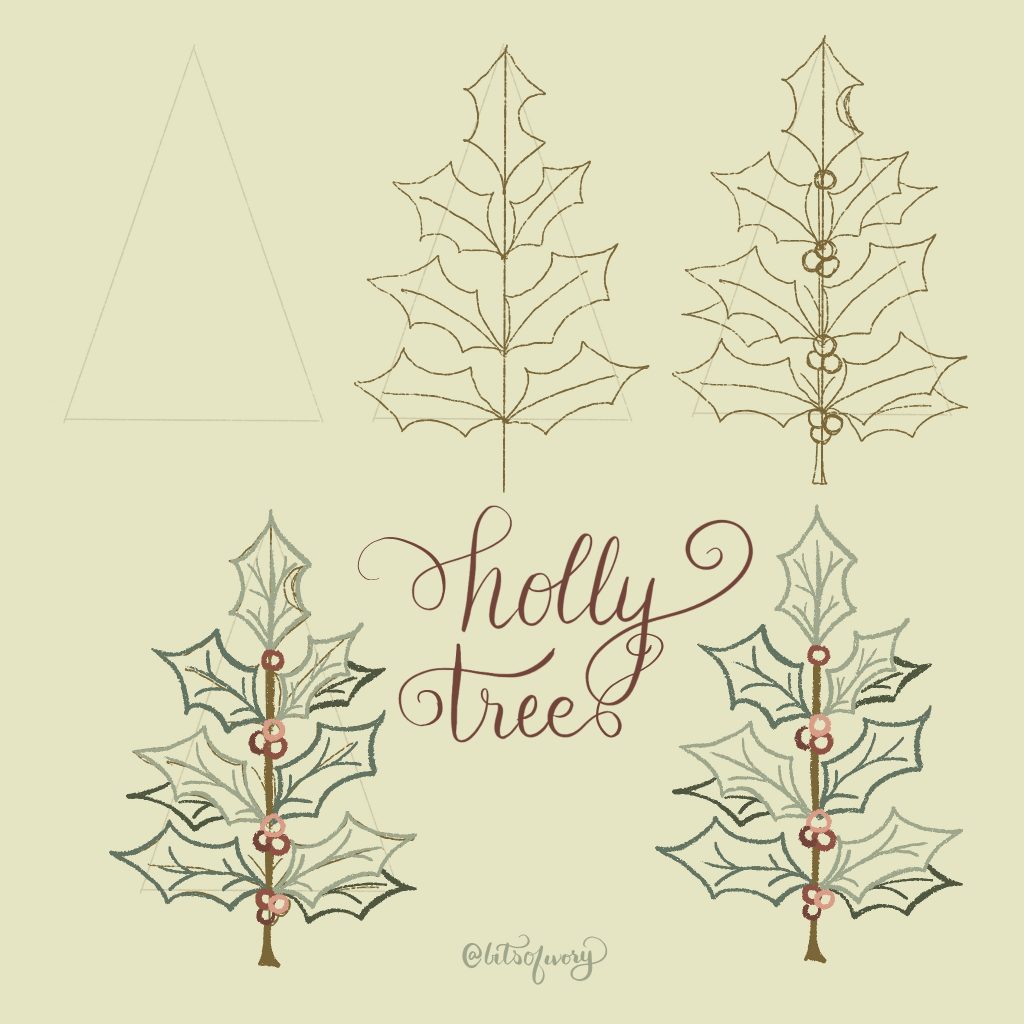
Draw a holly tree
If it's okay to choose favorites, this is mine! Start drawing your holly Christmas tree by drawing a line down the center of your triangle, extending the stem past the bottom of the shape.
Add upward angled lines for each branch. Then draw a reverse scalloped leaf shape at the top of your tree, pointing straight up and down. Continue drawing similarly shaped leaves pointing outward using each branch as a guide.
Add a leaf behind several of the other leaves for depth. I alternated mine on each side of the tree, but you can fill in any awkward spaces you find in this step – do whatever looks great to you! Then add circles at the base of each set of leaves for berries. You can vary the number of berries, but odd numbers look most natural.
You're now ready to draw or paint over your sketch! Consider using various shades to add depth to your tree. When you're finished, you can erase your pencil lines.
Anyone can draw Christmas trees, and these are perfect on your handmade Christmas cards and tags! Be sure to tag me on Instagram so that I can see your beautiful Christmas trees too. @bitsofivory
Source: https://bitsofivory.com/2020/12/10/how-to-draw-simple-christmas-trees/
0 Response to "drawing a simple christmas tree"
Post a Comment